We have you covered if you are looking for an easy and fun DIY Dunkin’ Donuts Ornament Craft.
We created this as an ornament, but it would be adorable hanging from a true Dunkin’ Junkin’ fanatic’s car or on their desk at work!
Most items can also be found at your local Dollar Tree. This post contains affiliate links. That means that if you purchase something there is a chance we may earn a small commission.
DIY Dunkin Donuts Ornament Craft
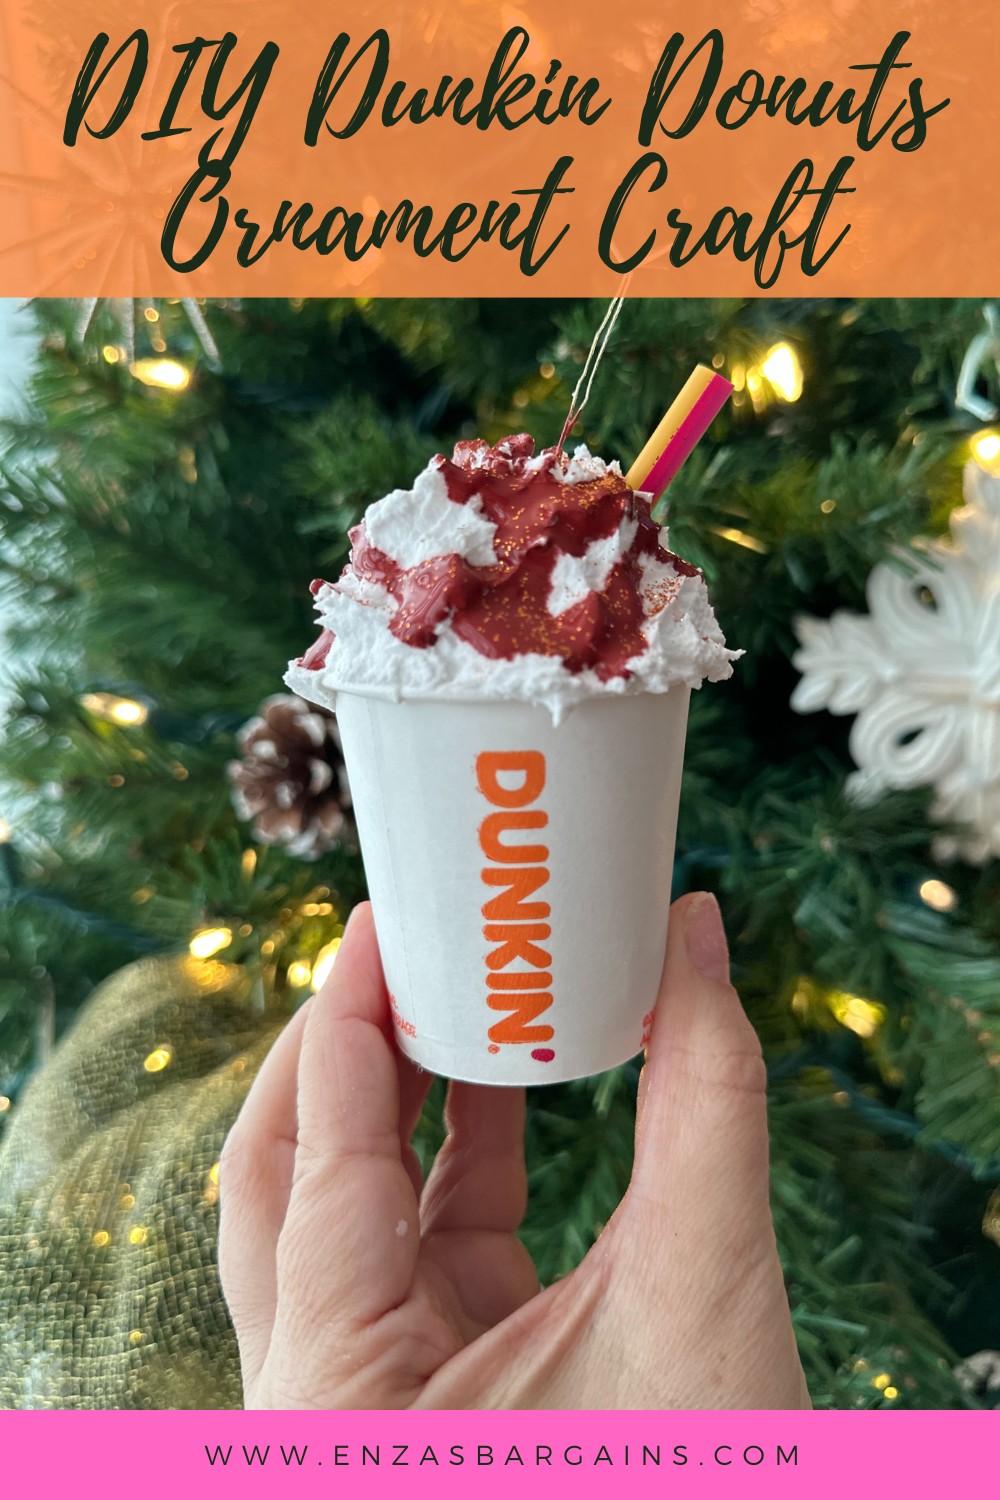
This adorable ornament is inspired by the hot signature latte from Dunkin’ Donuts!
To make this adorable little ornament there are several variations of things you need that you can swap out for what is suggested below.
What you need:
- Dunkin Donut small espresso cup
- Dunkin Donut straw
- Tin Foil
- Hot glue
- White spackle
- Brown shades of acrylic paint
- Small bell or round ornament
- Brown or copper fine glitter to be the “cinnamon”
How to Create Your Dunkin Donut Ornament Craft
- How to get your Dunkin cup? We are frequent Dunkin Donut goers in our household. During your next trip to Dunkin ask the manager for a cup or order a drink and ask for an extra cup! Also grab an extra Dunkin’ Donuts straw.
- Ball up a bit of tin foil and hot glue it in the bottom of your cup. Fill up your cut about 2/3 with your tin foil ball. We love this wireless hot glue gun! If you don’t have one it is great to own!
- Then hot glue your small ornament or bell on top of that. Be sure the string from the ornament is sticking upward. This should be above the cup because you will cover it with spackle which will be the “whipped cream”.
- To add the spackle, just use a spoon and scoop it on!
- Then drip some acrylic paint for the syrup topping and sprinkle it with glitter!
- Last but not least cut off a straw add a bit of hot glue and stick it into the “whipped cream”.
Watch the step-by-step DIY video here!


Leave a Reply